30 Halloween Party Decor Ideas That Will Haunt Your Guests (In the Best Way)

Introduction
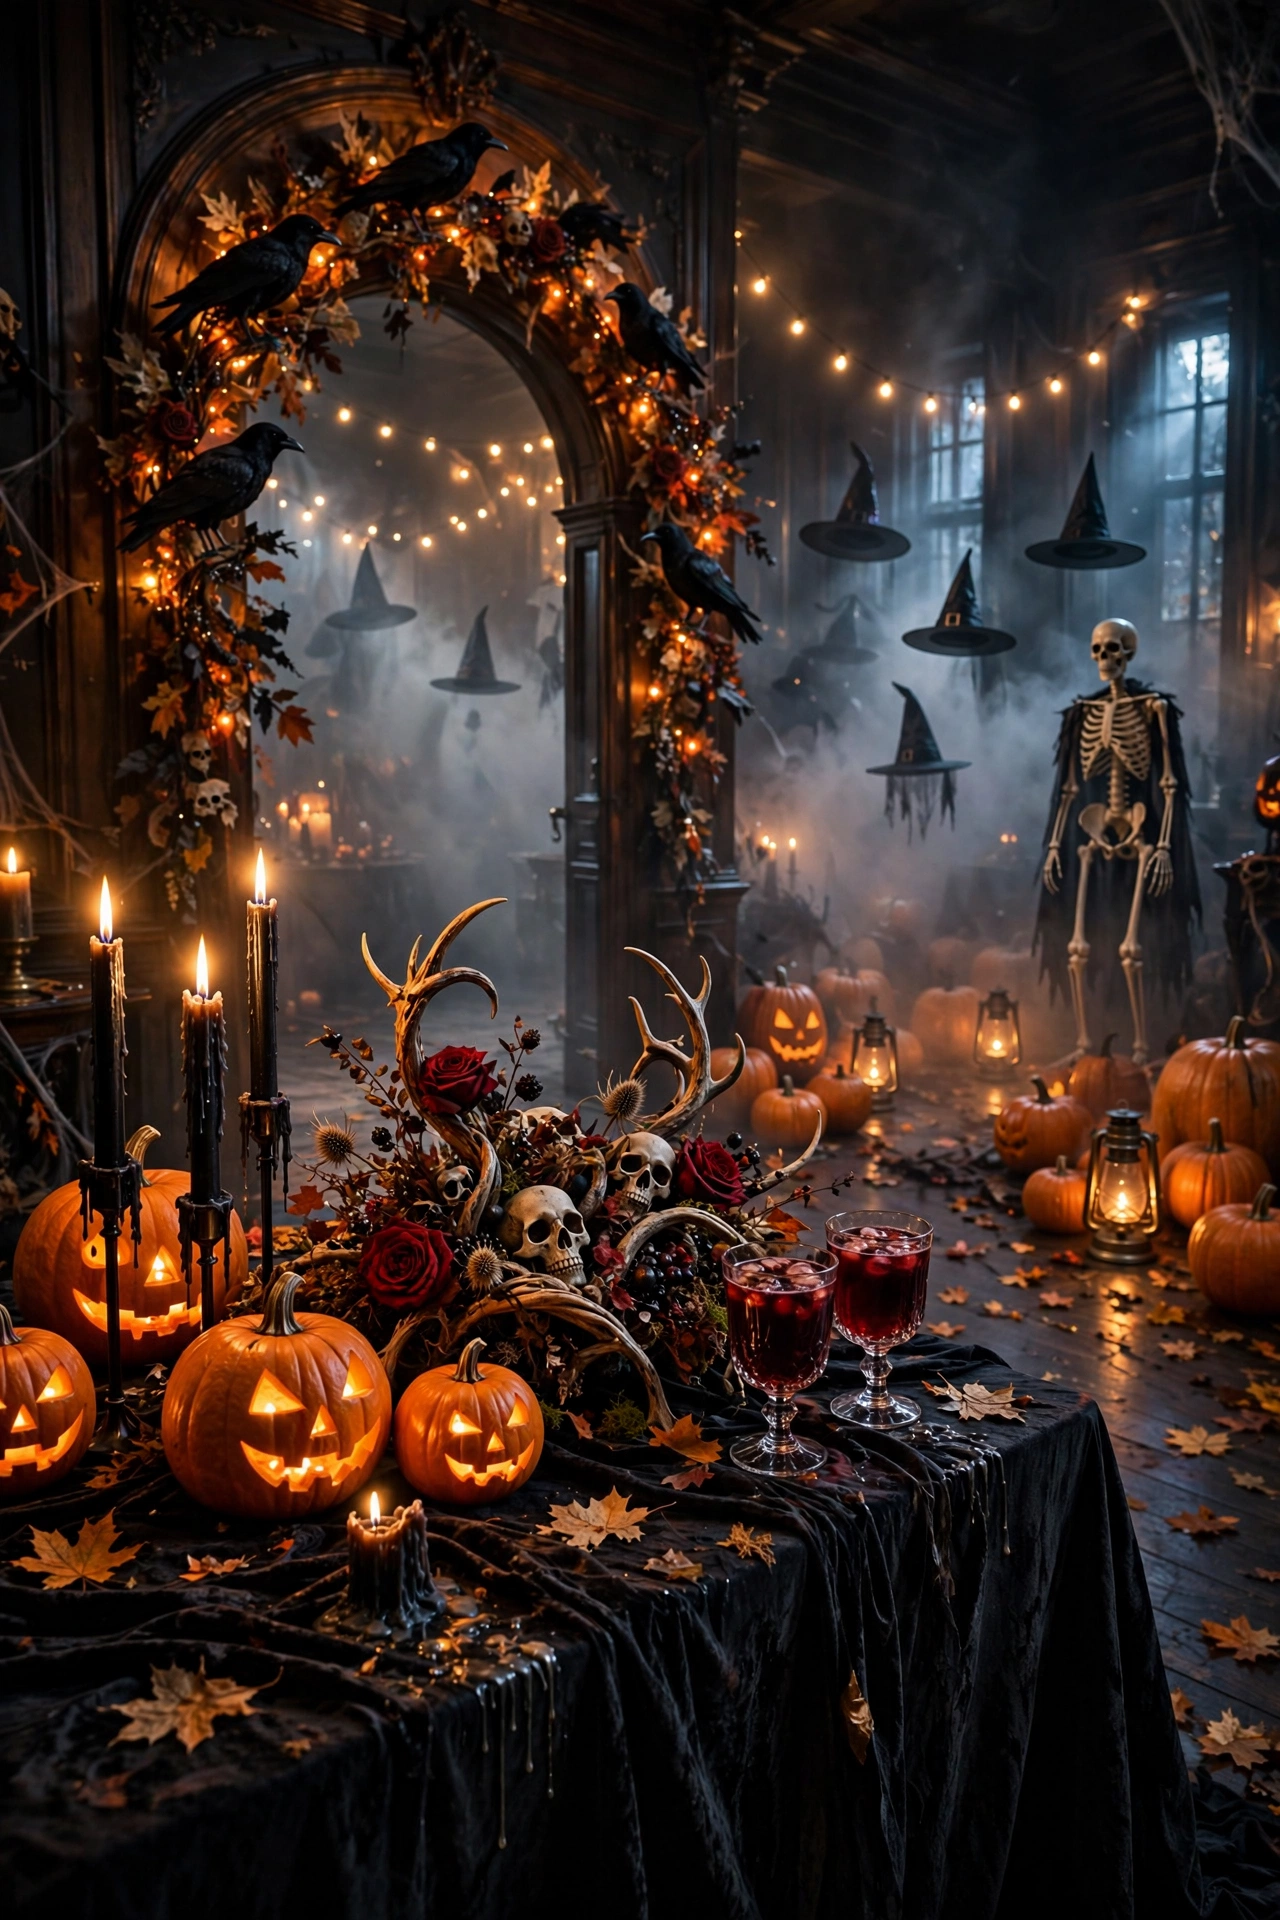
There’s something magical about the weeks leading up to Halloween. The air turns crisp, pumpkins appear on every porch, and homes everywhere get a chance to show off their spooky side. Whether you’re hosting an intimate dinner party or a full-blown costume bash, your decor sets the stage for the entire evening.
But great Halloween decorating is about more than scattering plastic spiders. It’s about creating an atmosphere, a feeling that wraps around your guests from the moment they step through the door. The best party spaces tell a story, guiding visitors from a haunting entryway through candlelit rooms to a dessert table they won’t forget.
That’s exactly what this guide delivers. Inside, you’ll find thirty carefully curated decor ideas, each one designed to inspire and easy to adapt to your home and style. From elegant gothic centerpieces to playful outdoor scenes, there’s something here for every taste and every budget. Each idea includes practical styling tips that interior design lovers will appreciate and busy hosts can actually pull off.
So grab a pumpkin spice latte, put on your favorite spooky playlist, and let’s transform your home into the Halloween party destination of the season. Your guests won’t know what haunted them.
1. Spooky Door Wreath with Black Crows
Your front door sets the tone before a single guest steps inside, and nothing announces a Halloween party quite like a dramatic
wreath. Start with a grapevine or matte black wreath base, which gives you a moody, textured foundation to build on.
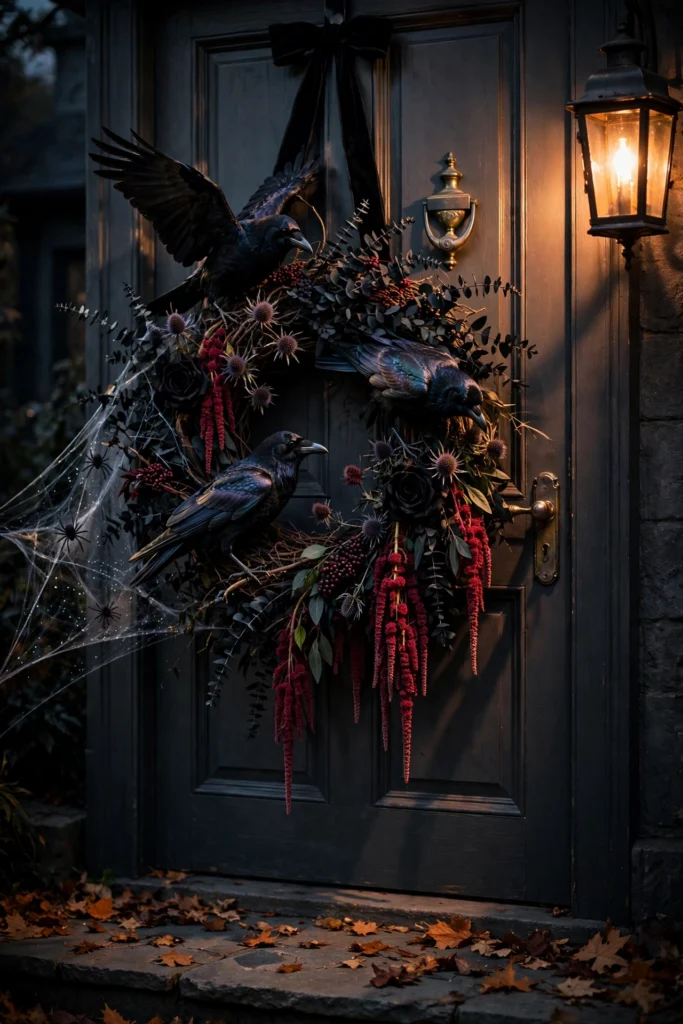
Tuck in sprigs of black-dyed eucalyptus, dried thistles, and dark red berries for that overgrown, gothic-garden feel. A few black roses or calla lilies tucked between the branches add a touch of elegance that keeps the look sophisticated rather than cartoonish.
Now for the stars of the show: perch two or three faux crows among the foliage, positioning them at different angles as if they have just landed. Craft stores sell lightweight birds with wire feet that grip branches easily. A light dusting of faux spiderweb stretched across one side completes the effect.
Hang the wreath from a black velvet ribbon for extra drama, and consider a small battery-operated spotlight aimed upward from the porch floor. The shadows it casts will make your wreath feel alive. Guests will pause to admire it before they even knock. When the season ends, store the wreath in a breathable garment bag so the foliage keeps its shape for next year.
2. Haunted House Entry Arch with Faux Cobwebs
Transform an ordinary doorway or porch entry into a haunted threshold with a draped arch. Use a tension rod or command hooks to suspend layers of black cheesecloth and gauze across the top, letting the fabric hang in uneven, tattered lengths.


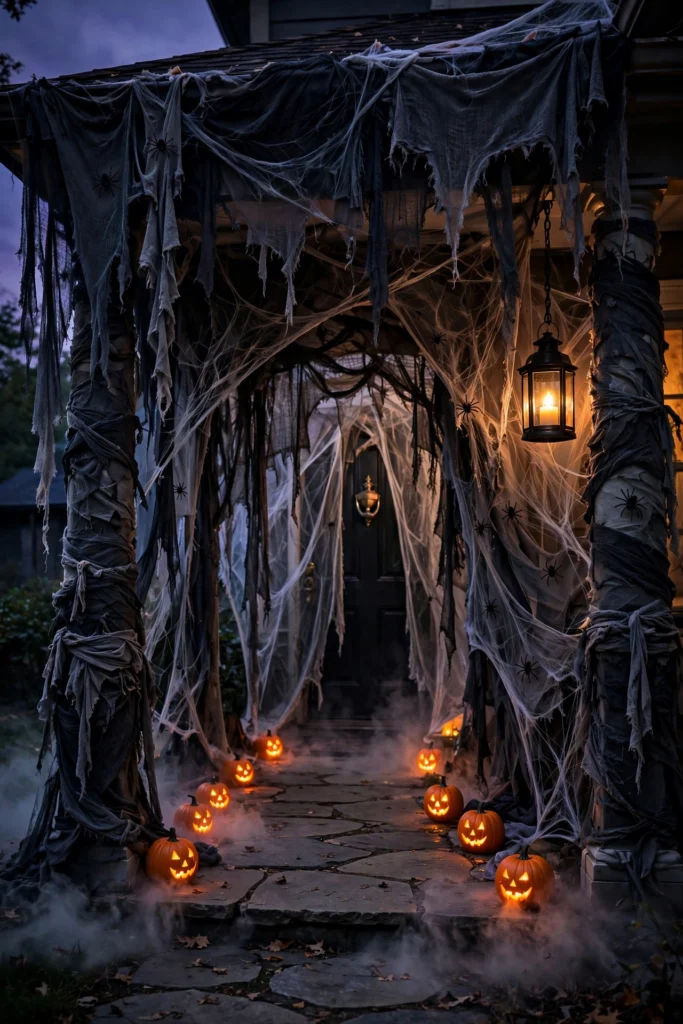
Stretch faux cobweb material across the fabric, anchoring it at corners and pulling gently so the webbing looks naturally windblown. Tuck a few plastic spiders into the folds where guests will spot them up close. This layered approach reads as genuinely eerie rather than store-bought.
For homeowners with a porch, extend the arch outward by draping fabric from the roof edge to create a short tunnel effect. Guests will feel they are stepping into another world the moment they cross beneath it. Choose outdoor-rated fabric if your porch is exposed, since morning dew can weigh down lighter gauze overnight.
Add a motion-activated cackling witch or a sudden burst of fog at the base to reward brave souls. Keep the pathway clear and well-lit at floor level for safety, letting the spookiness live overhead where it belongs. A quick test walk through the arch before guests arrive ensures nothing snags costumes or blocks the view of your decorations.
3. Trick-or-Treat Welcome Sign with Lanterns
A beautiful welcome sign does double duty: it greets guests warmly while doubling as party decor. Choose a distressed wooden board or a chalkboard with an ornate frame, and letter it with “Enter If You Dare” or “Witches Welcome” in calligraphy-style script.
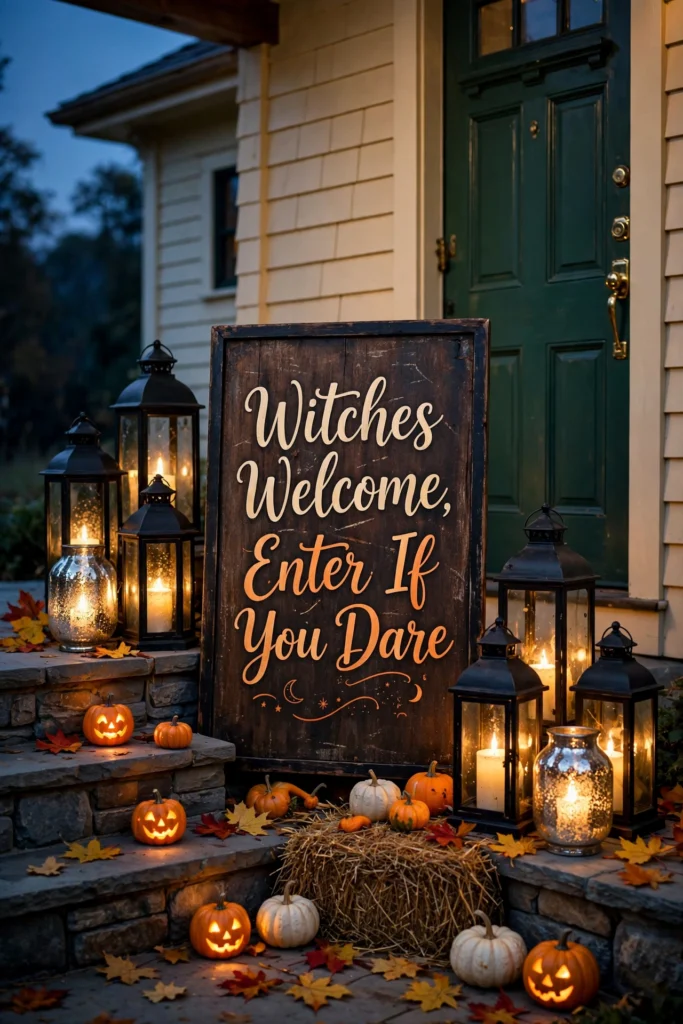
Flank the sign with lanterns of varying heights for a curated, designer look. Black metal lanterns with flickering LED candles are timeless, but mercury glass lanterns catch and scatter light in a way that feels magical after dark. Cluster three lanterns on each side, mixing heights for visual rhythm. Solar-powered lanterns are a smart upgrade here, charging by day and glowing automatically at dusk without any wiring.
If you have steps leading to your door, line them with smaller lanterns or LED pumpkins to create a glowing pathway. This kind of intentional lighting design is what separates a decorated home from a truly staged one.
Finish by scattering a few faux leaves and mini gourds around the sign’s base. The mix of textures keeps the vignette feeling organic and collected, like it grew there rather than being placed. Refresh the display each week of October by swapping in new gourds as the old ones age, keeping the vignette looking intentional all month.
4. Flickering LED Candles in Skull Holders
Candlelight is the soul of Halloween ambience, and skull holders turn it into sculpture. Place realistic skull candle holders down the center of your mantel or dining table, varying the sizes so the arrangement feels organic rather than matched.
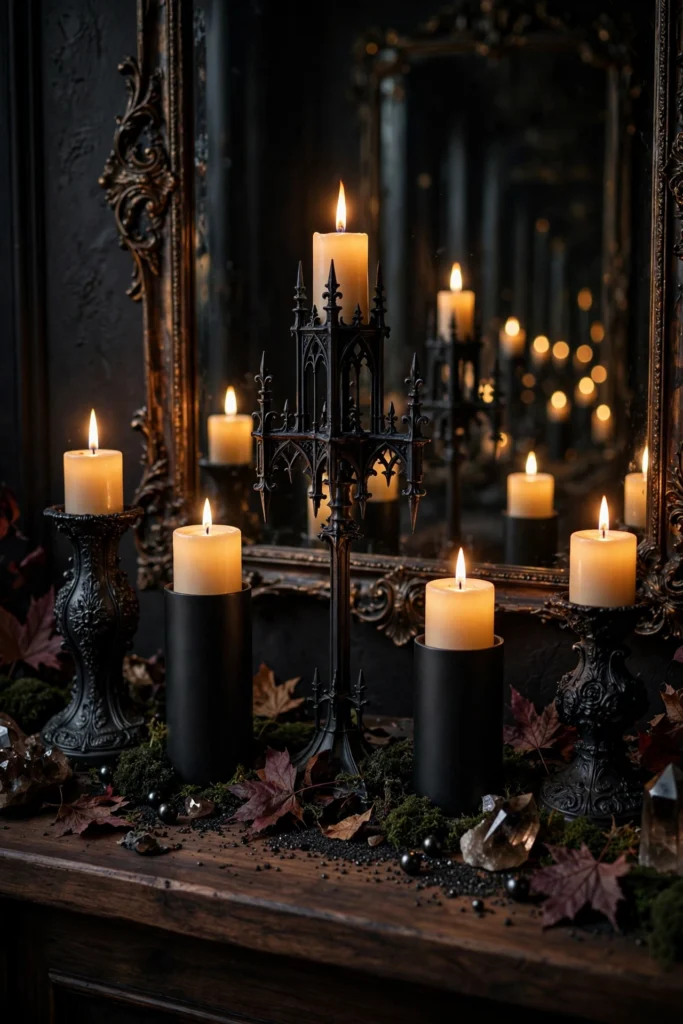
Use warm-toned LED candles with a realistic flicker effect rather than real flames. They are safer around fabric and foliage, and many now mimic the gentle waver of a real wick so convincingly that guests will do a double take. Choose a mix of heights for the candles themselves. Look for candles with a built-in timer function so they switch on automatically each evening, one less thing to remember during a busy party week.
Surround the skulls with loose moss, black sand, or dried autumn leaves to ground the display. A few scattered faux pearls or dark crystals add an unexpected glamorous contrast that interior design lovers will appreciate.
For a finishing touch, place a large mirror behind the arrangement. It will double the candlelight and create the illusion of an endless crypt corridor. This trick works beautifully on mantels and sideboards alike. Aged brass or mercury glass holders mixed among the skulls add warmth and keep the display from feeling one-dimensional.
5. Orange String Lights with Ghost Covers
String lights are the quickest way to make any room feel festive, and ghost covers elevate them from simple to storytelling. Slip small white fabric ghost covers over warm white fairy lights, spacing them evenly so each ghost gets its moment.
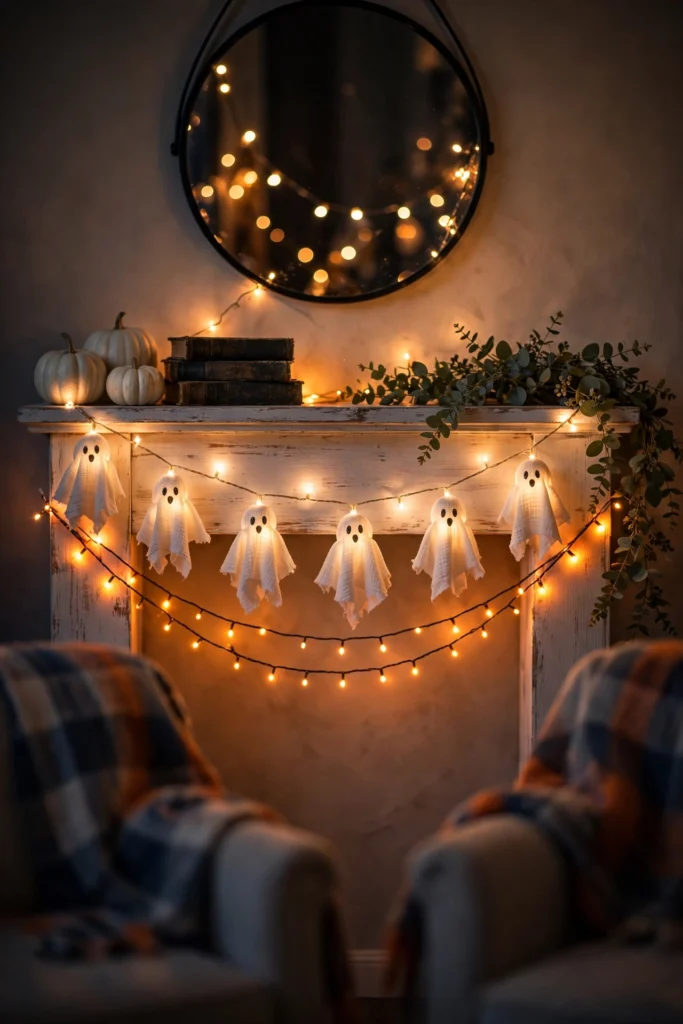
Drape the strand along a mantel, across a bookshelf, or swagged along a stair railing. The soft glow through the fabric diffuses beautifully, casting gentle shadows that feel playful rather than frightening. This is a wonderful option for homes with young children at the party.
For a more dramatic take, use larger ghost covers over globe lights and hang them at staggered heights from the ceiling in a corner. It becomes an installation piece that guests will photograph. Use removable ceiling hooks so you can adjust the height of each ghost until the composition feels balanced from every angle of the room.
Pair the ghosts with plain amber string lights layered underneath for depth. The combination of warm orange and soft white glow creates a rich, dimensional light that makes the whole room feel wrapped in Halloween magic. Battery packs tucked behind furniture keep cords invisible, which is the small detail that makes a light installation look professionally done.
6. Potion Bottle Glow Lights on Shelves
Apothecary-style potion bottles turn an ordinary shelf into a witch’s laboratory. Collect glass bottles in interesting shapes, from vintage decanters to small corked vials, and fill them with colored water, glitter, or tonic water that glows under blacklight.
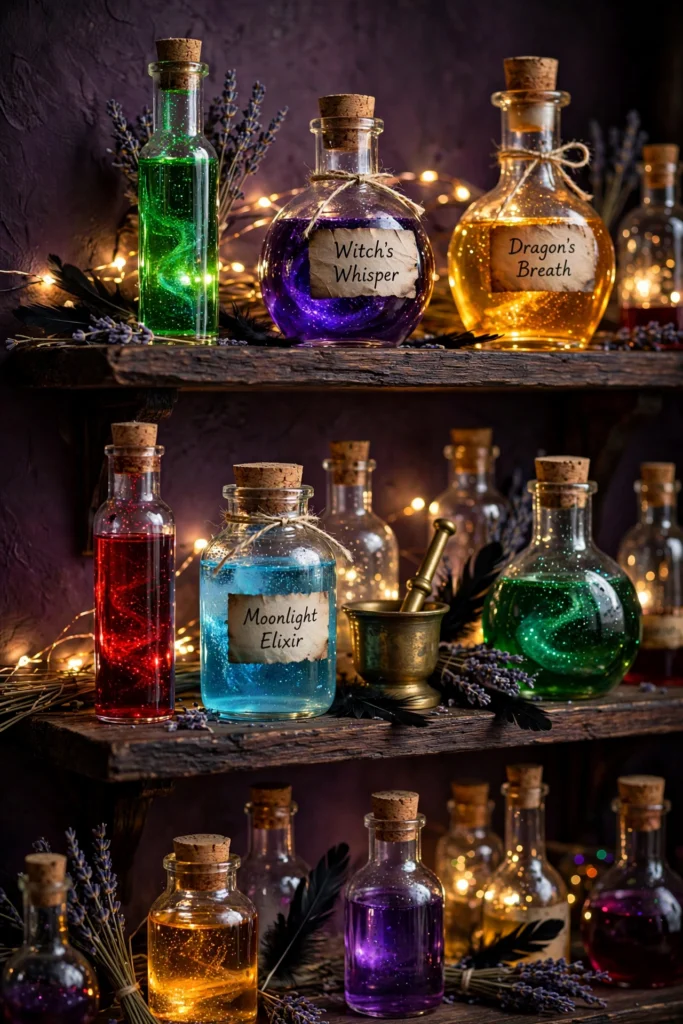
Tuck a string of micro fairy lights behind the bottles so the glow filters through the colored liquids. The backlighting makes each bottle look like it contains something bubbling and alive. Amber, emerald, and deep purple liquids photograph especially well. For an extra touch of realism, add a drop of dish soap to each bottle and give it a gentle shake before guests arrive so the liquid looks freshly stirred.
Add handwritten labels with names like “Dragon’s Breath,” “Moonlight Elixir,” or “Witch’s Whisper” using aged paper and twine. This small detail is what makes the display feel curated and intentional rather than random.
Arrange the bottles in odd-numbered groupings on floating shelves or a bar cart, mixing tall and short vessels. Thrift stores and flea markets are treasure troves for unusual bottles, and the hunt itself becomes part of the fun of building this display. If you have a blacklight nearby, the tonic water bottles will fluoresce, giving your shelf a secret second life after dark.
7. Jack-o’-Lantern Cluster with Varied Faces
A cluster of jack-o’-lanterns is a Halloween classic, but the secret to a designer look is variety. Carve or paint pumpkins in graduated sizes, giving each one a distinct personality, from mischievous grins to spooky stares to elegant cut-out patterns. Stencils from craft stores make intricate patterns achievable even if freehand carving is not your strength.
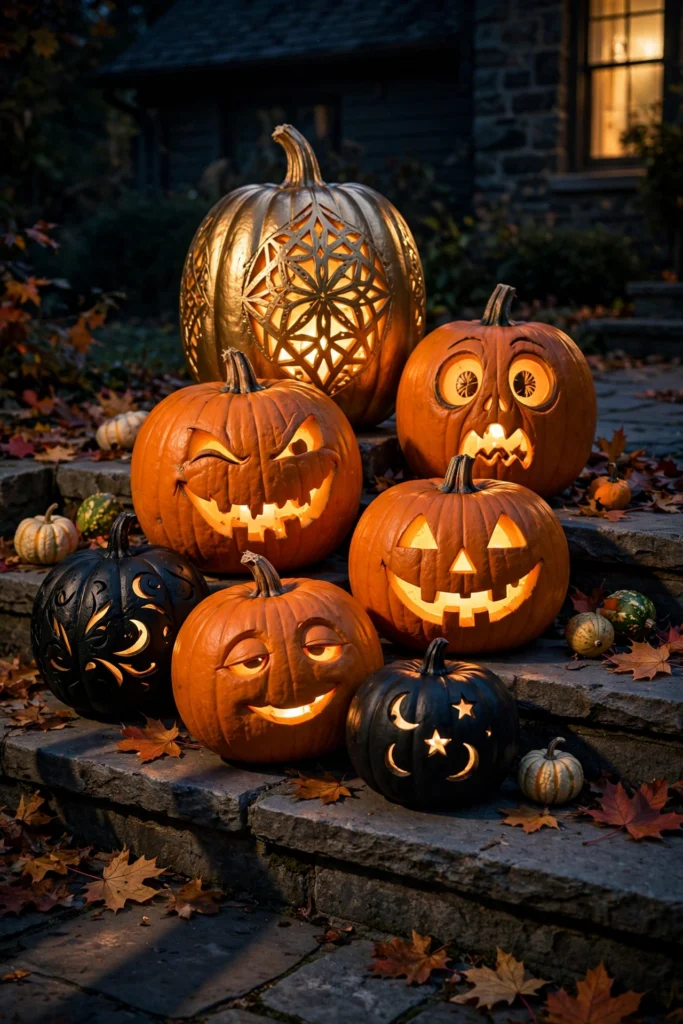
Arrange them in an asymmetrical grouping rather than a straight row. Place the tallest at the back, medium ones in the middle, and small ones forward, overlapping slightly. This creates depth and looks naturally gathered, the way a stylist would compose a still life.
Consider mixing real carved pumpkins with faux craft pumpkins painted in matte black, white, or metallic gold. The unexpected colors keep the display from feeling predictable, and faux pumpkins last the whole season without wilting. A light coat of matte sealant on painted pumpkins protects the finish, so your display stays crisp through rain and chilly October nights.
Light them from within using LED candles or string lights, and if you carve real pumpkins, rub the cut edges with petroleum jelly to keep them fresh longer. Positioned on a porch, mantel, or as a table centerpiece, a well-composed cluster becomes the heart of your Halloween decor.
8. Pumpkin Centerpiece with Black Roses
For an elegant dining table, pair heirloom pumpkins with black roses for a centerpiece that feels straight out of a gothic romance. Choose pumpkins in muted tones like dusty white, sage green, or pale blush rather than bright orange.
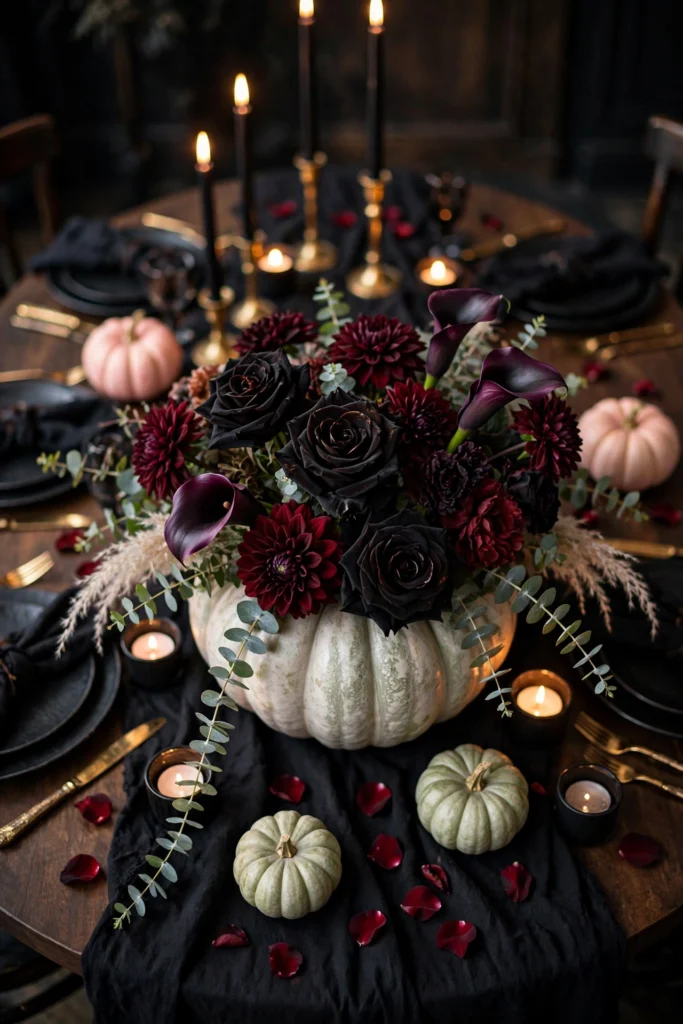
Hollow out a medium pumpkin and use it as a vase, inserting a foam block to hold the stems. Fill it with black or deep burgundy roses, dark calla lilies, and trailing eucalyptus. If hollowing a pumpkin feels daunting, simply nestle a small glass vase inside a larger pumpkin shell and arrange the flowers in that instead. The contrast between the soft pumpkin flesh and the dramatic blooms is stunning.
Surround the main arrangement with smaller pumpkins, votive candles, and scattered rose petals on the table. Keep the palette tight, no more than three colors, so the centerpiece reads as sophisticated rather than busy.
This look works beautifully for a sit-down Halloween dinner party. It proves that spooky season decor can be refined, and your guests will remember the table long after the last course is cleared. This arrangement also transitions beautifully to Thanksgiving by swapping the black roses for deep orange dahlias and wheat stalks.
9. Skeleton Hands Serving Bowl Display
Turn your snack table into a scene with skeleton hands emerging from a serving bowl. Position a large bowl of candy, popcorn, or chips so that articulated skeleton hands appear to be reaching out of it, as if something is climbing out of the treats.

You can achieve this by wiring the skeleton arms to a small stand hidden inside the bowl, then mounding the snacks around the base. Guests will laugh every time they reach in, which makes this as much an icebreaker as a decoration. Poseable skeleton arms from party stores usually have wire inside, so you can bend the fingers into a convincing grasping pose around the bowl’s edge.
Surround the main bowl with smaller bowls of snacks, each guarded by a single skeleton hand draped over the rim. The repetition turns a one-off gag into a cohesive theme across the whole table.
For a cohesive color story, use black bowls and fill them with treats in orange, red, and purple wrappers. The hands pop against the dark bowls, and the whole spread looks intentionally designed rather than hastily assembled. Keep a small extra bag of candy nearby to top up the bowls discreetly, since the hands tend to draw extra attention and extra handfuls.
10. Haunted Mansion Dining Table Setup
Channel the elegance of a Victorian haunted mansion for your dining table. Start with a black or deep plum tablecloth, then layer a sheer black lace overlay so the base color shows through the pattern. The lace adds texture and old-world romance.
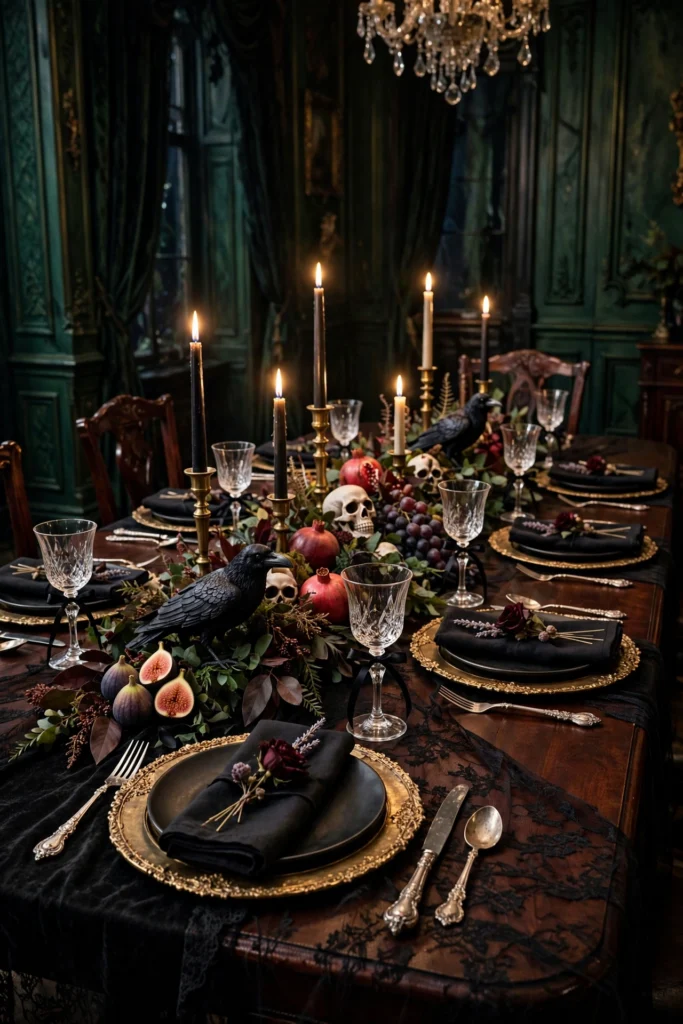
Set each place with dark dinnerware, antique-style flatware, and wine glasses tied with black ribbon. A sprig of dried lavender or a single black rose laid across each napkin makes every guest feel considered. Chargers in antique gold keep the look luxurious rather than gloomy.
Down the center, run a garland of dark foliage interspersed with candlesticks of varying heights. Mix taper candles in black and ivory, and add a few small skulls or ravens nestled into the greenery for discovery moments. Fresh figs, pomegranates, and dark grapes piled among the candles double as edible decor and give guests something to nibble before dinner.
Keep the overhead lighting dim and let the candles do the work. When the table glows from within like this, the whole room feels transported, and your dinner party becomes an experience rather than just a meal. A low playlist of classical strings or vintage jazz completes the haunted mansion illusion without overpowering conversation.
11. Apothecary Jar Collection with Labels
Glass apothecary jars filled with mysterious contents are endlessly versatile Halloween decor. Gather jars in different shapes and sizes, and fill them with candy corn, black jelly beans, faux eyeballs, plastic spiders, or dried botanicals like lavender and rosehips.
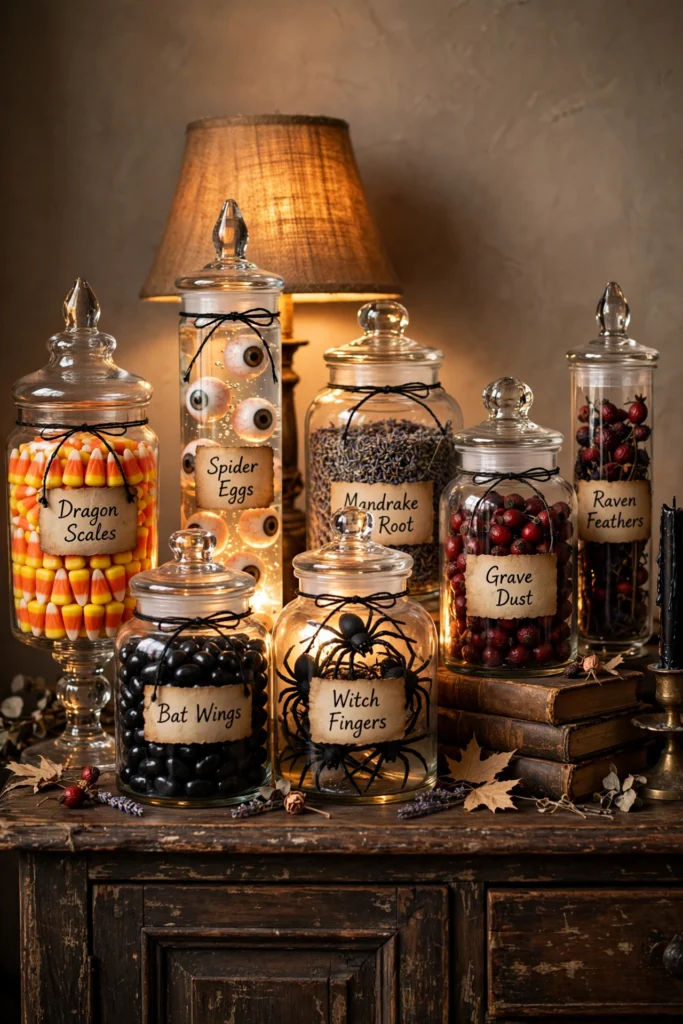
The key to a high-end look is the labeling. Create aged-looking tags with a printer or hand-lettering, naming each jar’s contents with fanciful titles like “Bat Wings,” “Spider Eggs,” or “Mandrake Root.” Tie the labels on with twine or black ribbon. A thrifted wooden crate or vintage suitcase underneath the jars adds height and gives the display a collected-over-time character.
Group the jars on a sideboard, bar cart, or entryway console in clusters of three or five, varying the heights. Place the tallest jars at the back and step down toward the front so every label is visible.
Backlight the display with a warm light source or place it near a window. The light shining through glass and candy creates a jewel-like glow that draws the eye. It is equal parts decor and conversation piece, and kids love reading the silly labels. After the party, simply refill the jars with everyday candy or bath salts and they become year-round storage with style.
12. Spiderweb Table Runner with Mini Spiders
A spiderweb table runner instantly transforms a plain table into a Halloween scene. Look for a runner made of stretchy web material or crocheted lace in a web pattern, and let it hang over the table edges for drama.
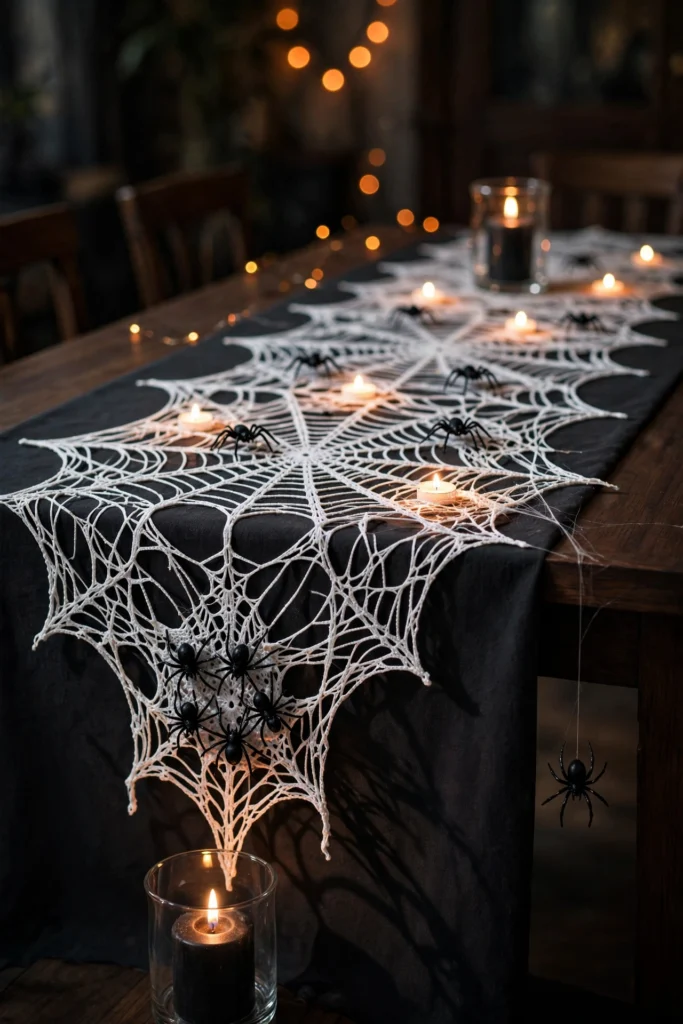
Scatter miniature spiders across the web, clustering a few together and leaving others solitary so it feels like a real infestation. Choose spiders with a slight sheen rather than flat plastic; they catch the light and look more realistic. Tiny LED tea lights nestled in the webbing make the whole runner shimmer, and the spiders’ shadows dance across the table in the flickering light.
Layer the runner over a solid tablecloth in black, charcoal, or deep purple. The contrast makes the web pattern pop, and the solid base keeps the table from looking messy underneath. This is an easy way to make rental or everyday tables party-ready.
Add low votive candles along the runner so their light throws long spider shadows across the table. It is a small detail with a big payoff, turning a simple runner into an atmospheric centerpiece that anchors your whole table design. This runner also works beautifully on a console table or mantel, so buy two and let the theme flow through multiple rooms.
13. Bat Swarm Wall Decals Creeping Up
A swarm of bats sweeping across a wall creates movement and drama with almost no effort. Use removable vinyl bat decals in assorted sizes, starting with a dense cluster near a corner and scattering them outward as if the colony is taking flight.
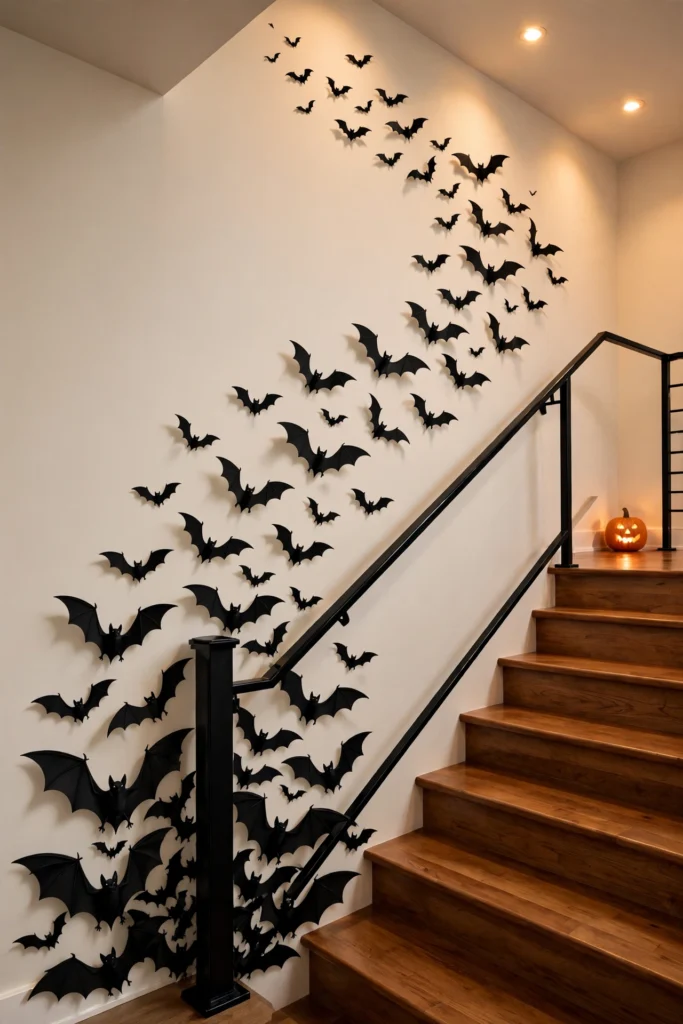
The secret to a realistic swarm is varying the sizes and angles. Place the largest bats at the origin point and graduate to smaller ones as they spread, rotating each decal slightly so no two bats face exactly the same direction. Most sets include three sizes, which is exactly the range you need for a convincing sense of perspective. This mimics how a real flock moves.
Let the bats creep up a stairwell wall, across a fireplace, or over a doorway for maximum impact. Because the decals are removable, you can be bold with placement without worrying about paint damage, which renters will appreciate. On textured walls, press each decal firmly with a credit card to smooth out air bubbles and ensure the edges stay flat all season.
For evening parties, position a light source so the bats cast soft shadows on the wall behind them. The doubled silhouettes make the swarm look twice as large and add a layer of depth that flat decals alone cannot achieve.
14. Floating Ghosts on Window Panes
Cheesecloth ghosts floating against windowpanes create a hauntingly beautiful effect, especially when backlit. Drape white cheesecloth over a small balloon or foam ball to form the head, then let the fabric fall in ghostly tatters. A dab of fabric stiffener helps the shape hold. If your windows have deep sills, rest a few ghosts directly on the sill at different depths for a layered, dimensional look from the street.
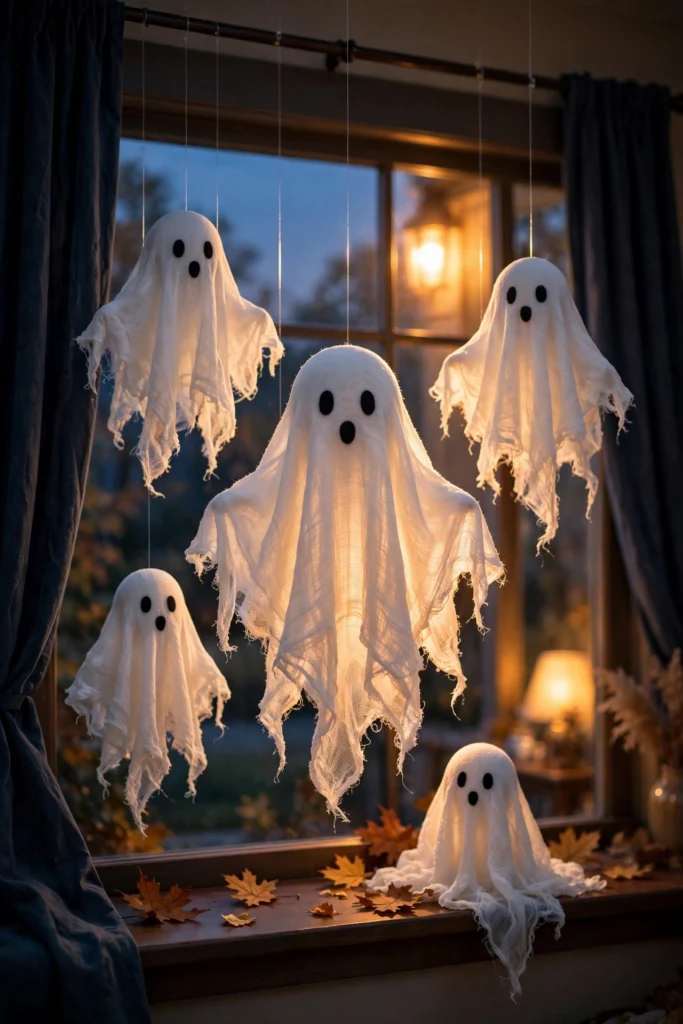
Hang the ghosts at different heights in front of windows using clear fishing line attached to the curtain rod. From outside, they appear to hover in the glass; from inside, daylight gives them an ethereal glow that is pure magic.
Add simple black felt eyes and a mouth, keeping the faces sweet rather than scary if children will be at the party. The handmade quality of these ghosts is part of their charm, so embrace slight imperfections.
At night, place a soft light behind the window or use the porch light outside. The ghosts become glowing sentinels visible from the street, turning your windows into a neighborhood attraction. These ghosts pack flat for storage, so you can reuse them year after year, adding a few new ones each season to grow the collection.
15. Vintage Horror Movie Poster Gallery
A gallery wall of vintage horror movie posters brings instant personality and a collector’s soul to your party space. Hunt for reproduction prints of classics like Nosferatu, Frankenstein, or The Bride of Frankenstein, which have gorgeous art-deco styling.
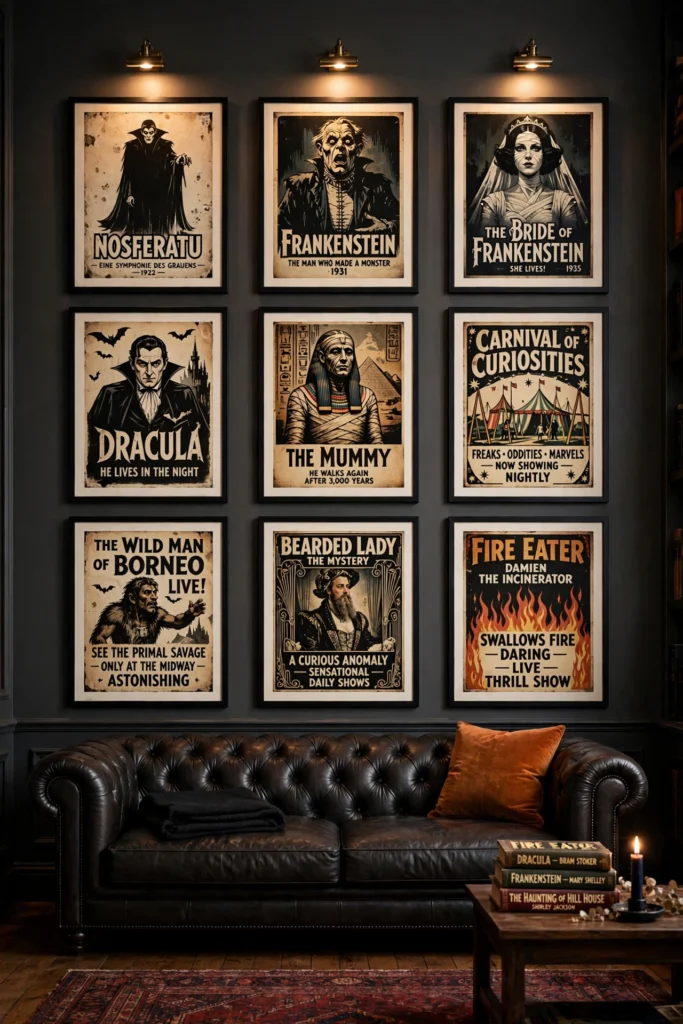
Frame them uniformly in thin black frames to give the collection a gallery feel. Consistent framing is what separates a curated wall from a cluttered one, even when the posters themselves are wildly different. Use kraft paper templates taped to the wall to plan your layout before hammering a single nail, a trick borrowed from professional gallery installers. Hang them in a tight grid or a salon-style cluster.
Mix in a few unexpected pieces like vintage carnival or sideshow posters to keep the wall from feeling one-note. The variety invites guests to wander over and explore, sparking conversations about favorite films. Estate sales often turn up original vintage posters at surprising prices.
Add small picture lights or clip-on spotlights above the frames. Proper lighting makes the posters feel like a real exhibition and gives that corner of the room a museum-quality glow that elevates the whole party. After Halloween, swap the horror prints for autumn landscapes in the same frames and your gallery wall works straight through Thanksgiving.
Quick Planning Guide: Budget & Setup Time by Decor Zone
Use this planner to budget your shopping and schedule your decorating day:
| Decor Zone | Key Items to Buy | Est. Budget | Setup Time |
|---|---|---|---|
| Entryway & Porch | Wreath, lanterns, welcome sign | $30-$60 | 1 hour |
| Lighting & Ambience | LED candles, string lights, fairy lights | $20-$40 | 30 min |
| Table Centerpieces | Pumpkins, skull holders, table runner | $25-$50 | 45 min |
| Wall Decor | Bat decals, posters, garlands | $15-$35 | 30 min |
| Ceiling Installs | Hanging ghosts, witch hats, balloon garland | $15-$30 | 45 min |
| Photo Booth | Backdrop fabric, props, frame | $20-$40 | 30 min |
| Food & Drink Stations | Cauldrons, coffin trays, dry ice | $30-$70 | 1 hour |
| Outdoor & Yard | Inflatables, tombstones, fog machine | $50-$150 | 1-2 hours |
| Floors & Details | Floor decals, scented fog fluid | $15-$40 | 30 min |
| Favors & Final Touches | Treat bags, candy, decorating supplies | $20-$40 | 30 min |
16. Hanging Paper Lantern Ghosts
Paper lantern ghosts are a charming, budget-friendly way to fill vertical space. Take white paper lanterns in various sizes, draw simple spooky faces with a black marker, and hang them from the ceiling at staggered heights.
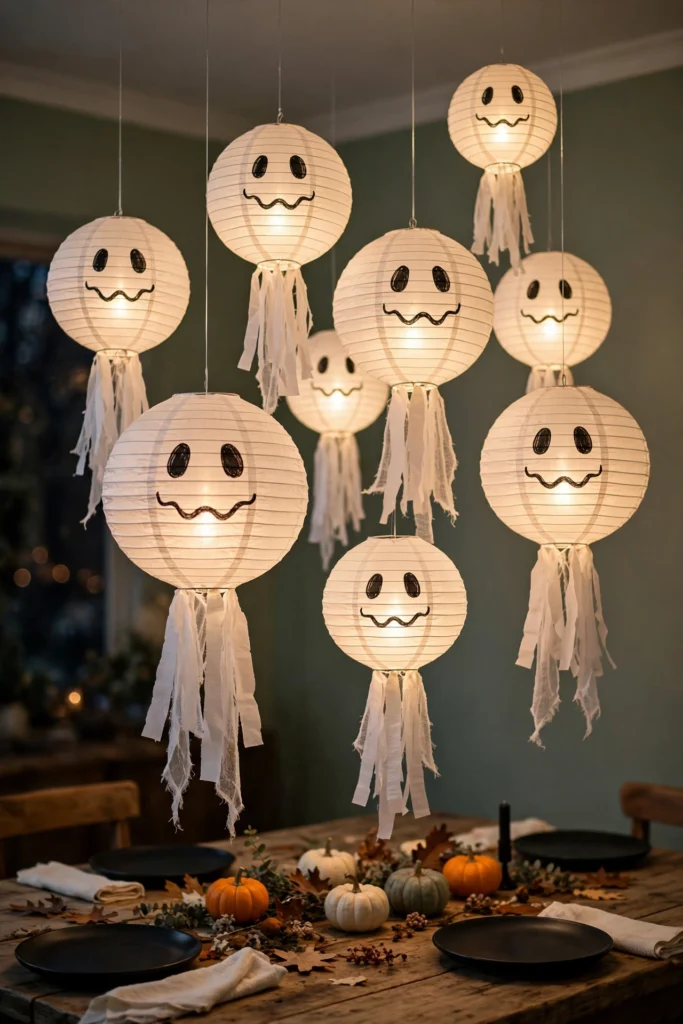
The round lantern shape reads instantly as a ghost, and the size variation creates a playful sense of depth. Hang them over the food table, in the entryway, or clustered in a corner to define a party zone within a larger room.
Insert battery-operated LED lights inside each lantern so they glow softly. The light diffuses through the paper beautifully, and because the lights are cool to the touch, this is a safe option even in homes with low ceilings. Choose lights with a warm white tone rather than cool blue, since warm light flatters both the paper and your guests’ faces in photos.
For an extra touch, attach strips of white crepe paper or cheesecloth to the bottom of each lantern as flowing ghost tails. They will sway gently with air movement, making your ghost gathering feel alive and adding motion to the room. When the party ends, collapse the lanterns flat and store them with the lights removed, ready to haunt again next October.
17. Black and Orange Balloon Arch
A balloon arch in classic Halloween colors makes a bold statement at your entrance or behind the food table. Use an arch kit or PVC frame, and alternate matte black, glossy orange, and a few metallic gold balloons for richness and depth.
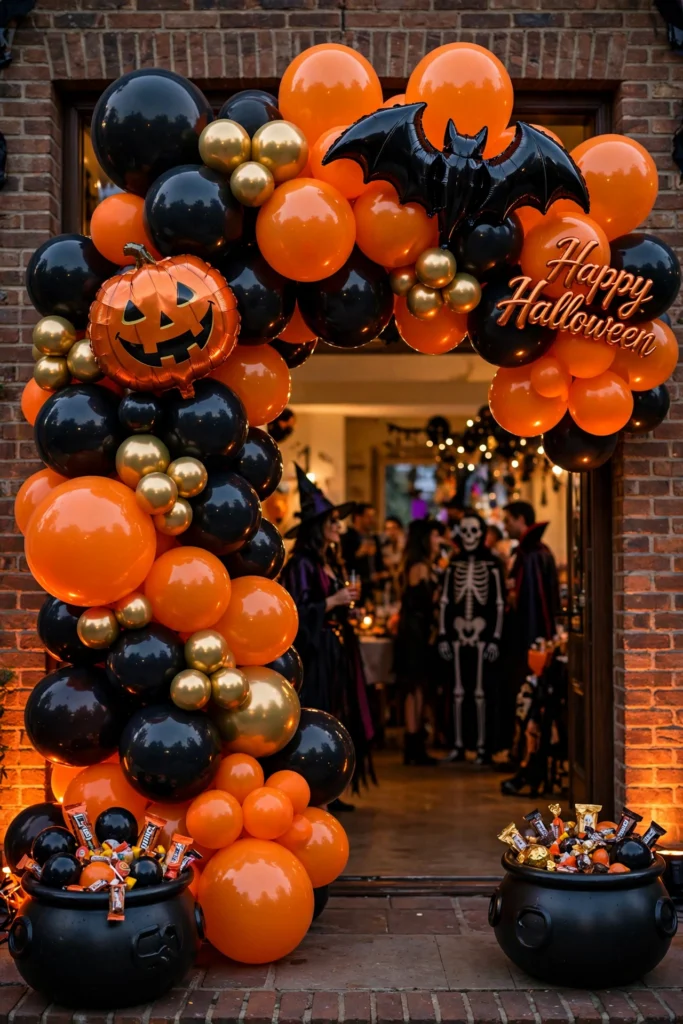
Vary the balloon sizes within the arch, mixing large statement balloons with smaller filler ones. This organic style looks far more high-end than a uniform arch, and it photographs beautifully. Tuck in a few mylar bat or pumpkin balloons as accents. A handheld electric balloon pump is worth every penny here, turning an hour of huffing into ten minutes of easy inflation.
Anchor the base with balloon weights disguised inside small cauldrons or pumpkin buckets. This keeps the arch stable while adding to the theme, and it solves the practical problem of a toppling arch mid-party. Double-stuffing two balloons together creates rich custom colors like deep burgundy.
Position the arch where guests will naturally pause, like the entryway or in front of a backdrop. It becomes an instant photo opportunity, and those photos will carry your party’s style across social media long after the night ends. Build the arch the morning of the party for maximum freshness, since balloons begin to deflate noticeably after about twelve hours.
18. Spooky Photo Booth Backdrop
Every great party needs a photo moment, and a Halloween photo booth backdrop delivers. Hang a black or deep purple fabric backdrop, then layer it with hanging bats, tattered cheesecloth, and strands of orange fairy lights for dimension. Command hooks hold the fabric securely without damaging walls.
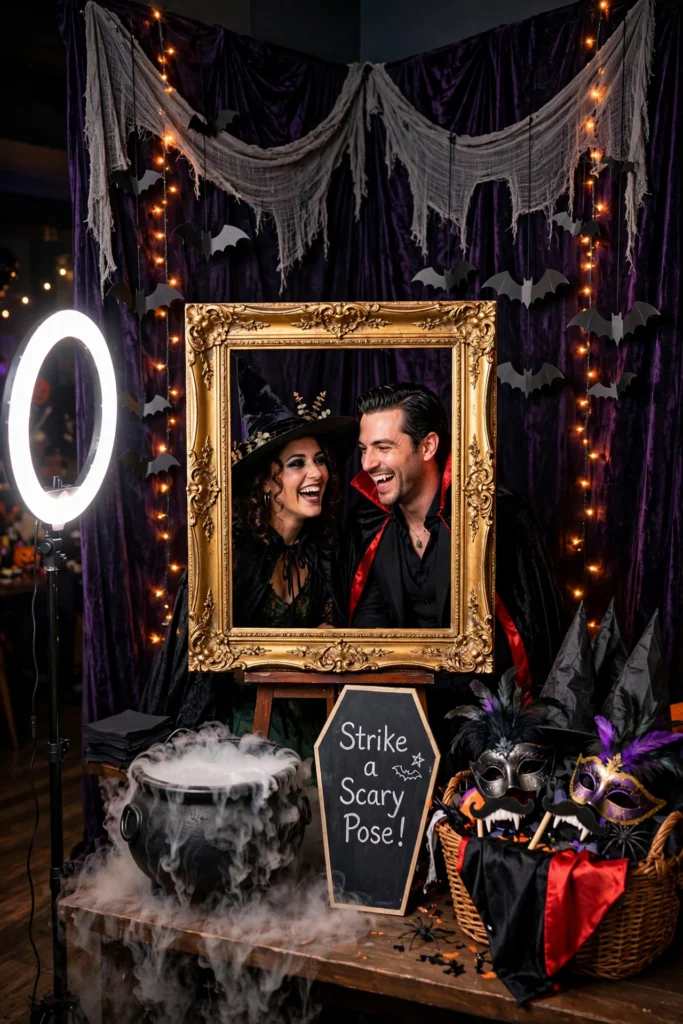
Add freestanding props like an ornate vintage frame guests can hold up, a coffin-shaped chalkboard for writing messages, and a cauldron to pose beside. The frame in particular makes every photo look like a portrait from a haunted gallery. A vintage suitcase stacked beside the backdrop holds extra props and adds to the scene when it is not being rummaged through.
Keep a basket of costume props nearby: witch hats, vampire capes, masquerade masks, and fake mustaches. Guests who arrived without costumes can still join the fun, and the props guarantee silly, shareable photos.
Good lighting makes or breaks a photo booth, so add a ring light or position the backdrop near a bright lamp. When guests look great in their photos, they share them, and your party becomes the one everyone talks about. Designate a hashtag for the night and display it on a small sign, so you can relive every guest’s photos in one place afterward.
19. Ghost Balloon Garland Ceiling Install
Take balloons to the ceiling with a ghost garland installation that floats overhead. Inflate white balloons in various sizes, draw simple ghost faces on them, and attach them to a long strand of clear line with varying drop lengths.
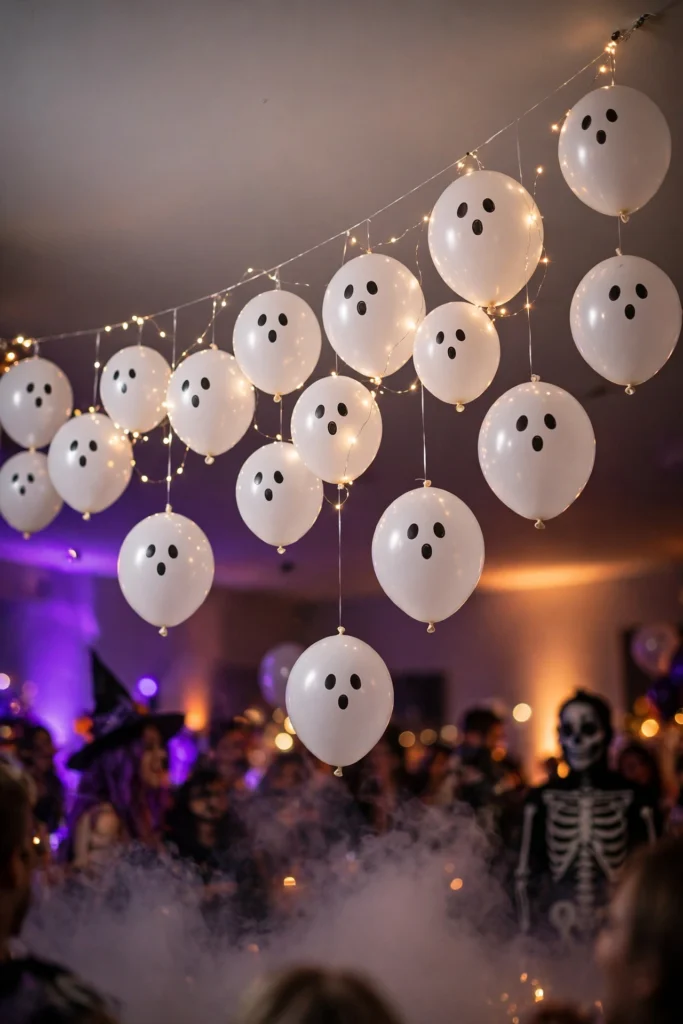
Hang the garland across the ceiling of your main party room, letting the ghosts bob at different heights. From below, it looks like a friendly haunting drifting overhead, and it fills empty ceiling space that often gets ignored in party decor. In rooms with ceiling fans, keep the garland clear of the blades and secure the line to two anchor points so it cannot drift.
Weave orange and purple fairy lights through the garland so the ghosts glow gently. The combination of floating shapes and twinkling light creates a dreamy, immersive canopy that transforms the whole feel of the room.
This installation works especially well in rooms with high ceilings or over a dance floor area. It draws the eye upward, makes the space feel intentionally designed from floor to ceiling, and gives guests something delightful to discover when they look up. This overhead installation pairs wonderfully with a fog machine below, making the ghosts appear to float above the clouds.
20. Candy Bar Display with Cauldron Bowls
A candy bar is both decor and entertainment, and cauldron bowls make it unmistakably Halloween. Set up a table with a dark cloth and arrange three or more black cauldrons, each filled with a different candy: wrapped chocolates, gummy eyeballs, candy corn, and sour treats.
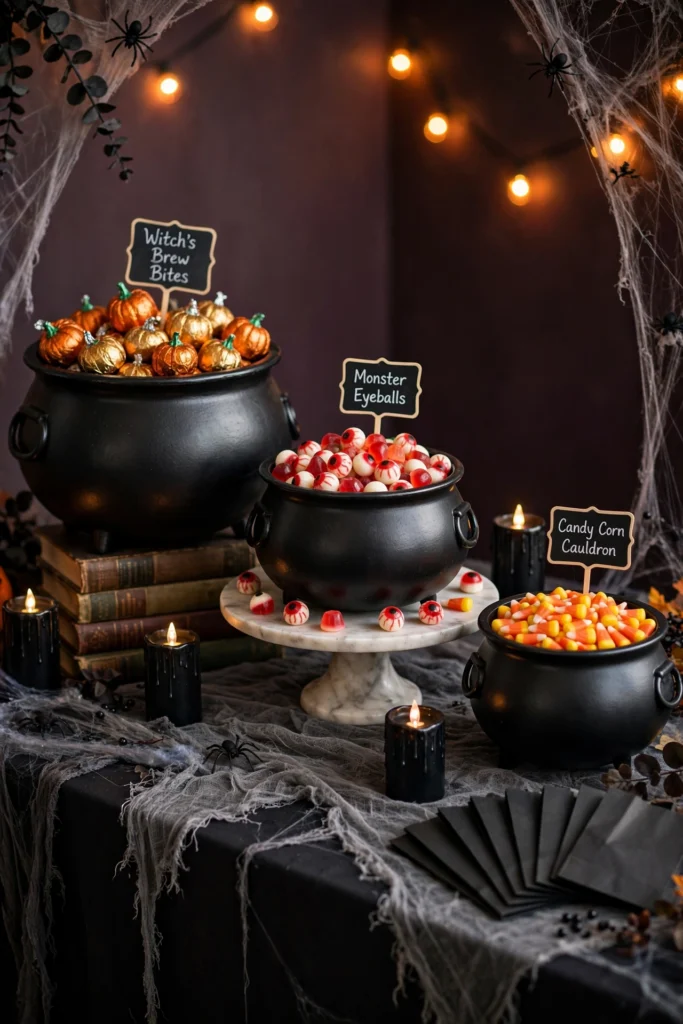
Label each cauldron with a playful sign like “Witch’s Brew Bites” or “Monster Munch.” Use small chalkboard stakes or aged paper tags tied with ribbon. The labels turn a simple candy spread into a themed experience. Tiered stands made from stacked vintage books and a plate create charming height without buying anything new.
Add height variation with cake stands and stacked books beneath some cauldrons. Drape faux cobwebs across the table and scatter plastic spiders among the candy. A blacklight overhead makes neon candy wrappers glow like treasure. A few LED candles add a warm glow that makes the candy colors pop.
Provide small paper bags or mini cauldrons so guests can fill their own take-home treats. The candy bar becomes a natural gathering spot, and the interactive element keeps guests circulating and mingling throughout the night. Print a small menu card listing any allergens in the candy selection, a thoughtful touch that parents especially will appreciate.
21. Spooky Cocktail Station with Dry Ice
A cocktail station with dry ice is pure theater. Set up a bar cart or side table with bottles, mixers, and glassware, then place a large punch bowl or cauldron at the center with dry ice hidden beneath a smaller inner bowl of punch.
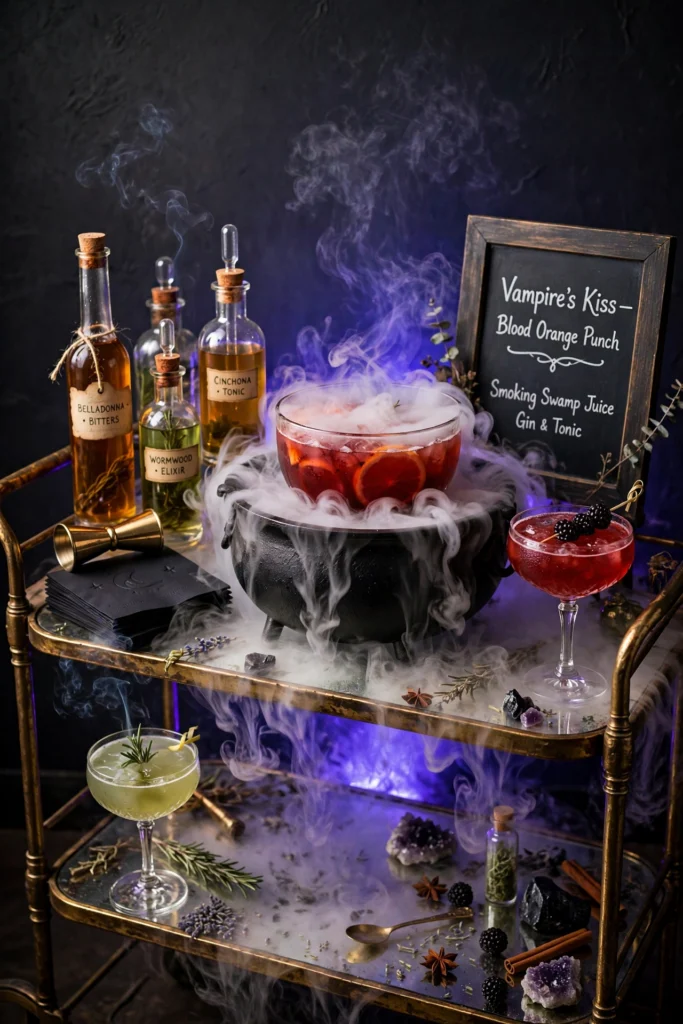
The fog cascading over the bowl’s edge looks like a witch’s brew, and guests will crowd around to watch. Always handle dry ice with tongs and gloves, and never let it touch the drink directly; the inner-bowl method keeps it safe while delivering the drama.
Label your signature drinks with spooky names like “Vampire’s Kiss” or “Smoking Swamp Juice” on tented cards. Offer one batched punch plus the fixings for a second simple cocktail so guests have choice without you playing bartender all night. Batch your punch in advance and keep a backup jug in the fridge so refills take seconds during the party rush.
Surround the station with potion bottles, a few skulls, and dim lighting. The bar becomes a destination within the party, and the fog effect guarantees it will be one of the most photographed spots of the evening. A small framed drinks menu lets guests serve themselves confidently without hovering around you for instructions.
22. Dessert Table with Coffin Serving Trays
Coffin-shaped serving trays turn your dessert table into a delightfully macabre display. Arrange cupcakes, cookies, and cake pops on black coffin trays at varying heights, using boxes or books underneath to create levels.
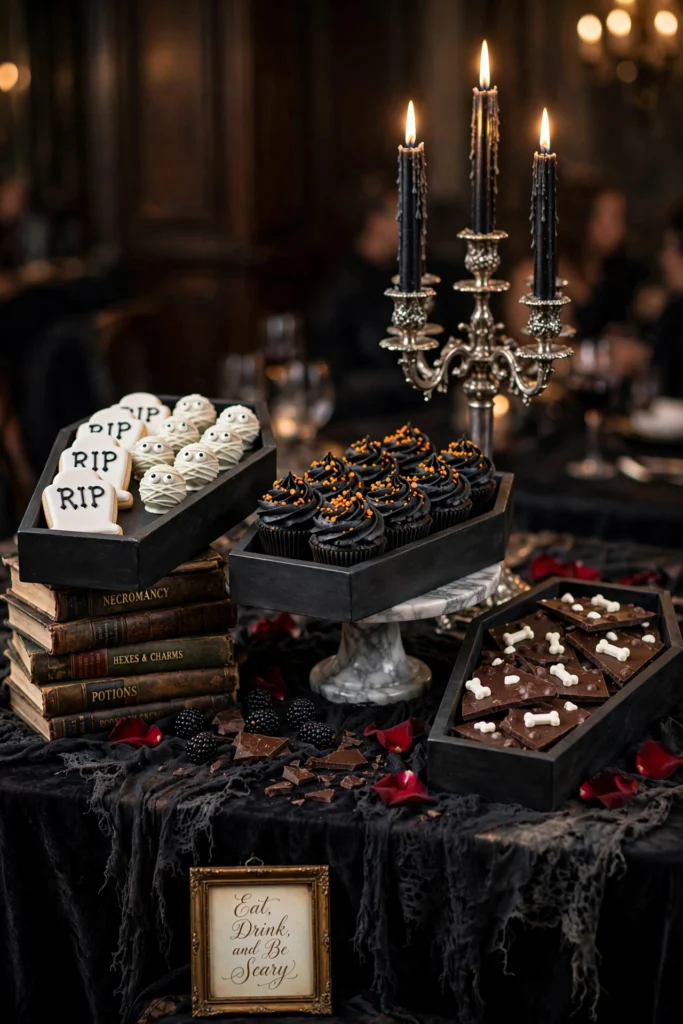
Decorate the treats themselves to match: tombstone cookies, mummy-wrapped cake pops, and cupcakes with orange and black frosting. When the food echoes the serving pieces, the whole table feels like a single designed concept. Black cocoa powder gives frosting a dramatic color without artificial dyes, and it tastes wonderfully rich.
Drape the table with a black cloth and a tattered cheesecloth overlay, then add candelabras with black taper candles for height and drama. A few scattered rose petals in deep red soften the look and add a gothic romance. Fresh blackberries and dark chocolate shards scattered between the trays add an edible, elegant layer to the display.
Place a small framed sign with a witty phrase like “Eat, Drink, and Be Scary” at the front of the table. It gives guests permission to indulge and ties the display together. Keep a cake server and small plates stacked at one end so the table stays tidy as guests help themselves. This is the table everyone will remember and photograph.
23. Inflatable Haunted Castle Scene
An inflatable haunted castle makes an instant statement in your front yard. These large-scale decorations have come a long way, with detailed printing, internal lighting, and animated elements that bring the scene to life after dark.
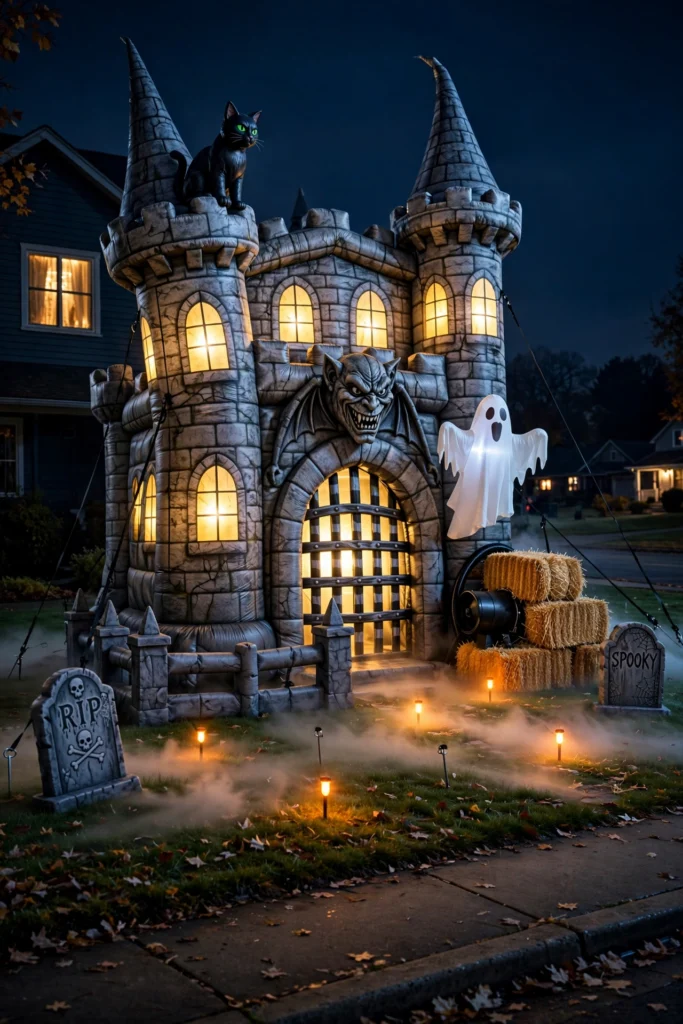
Position the castle where it is visible from the street but does not block walkways. Stake it down securely and keep the blower’s power cord tucked safely along the house. Most models inflate in minutes, making this one of the highest-impact, lowest-effort decorations available. Check your local forecast before setup day, since most inflatables should come down in winds above twenty miles per hour.
Enhance the scene by surrounding the base with smaller decorations like inflatable ghosts, tombstones, or a fog machine. Layering pieces of different scales creates a full vignette rather than a single lonely inflatable. Solar spotlights staked into the lawn around the scene add dramatic uplighting without running extension cords across the yard.
Choose a model with built-in LED lighting so it glows from within at night. A lit castle visible down the street turns your home into a neighborhood landmark and sets expectations for a legendary party inside. Deflate and dry the castle thoroughly before storing to prevent mildew, and it will last for many Halloweens to come.
24. Graveyard Front Yard Setup with Fog
A front yard graveyard is the quintessential Halloween scene. Arrange foam tombstones at varied angles and depths, some tilted as if sinking into the earth, and mix in a few with humorous epitaphs for personality.
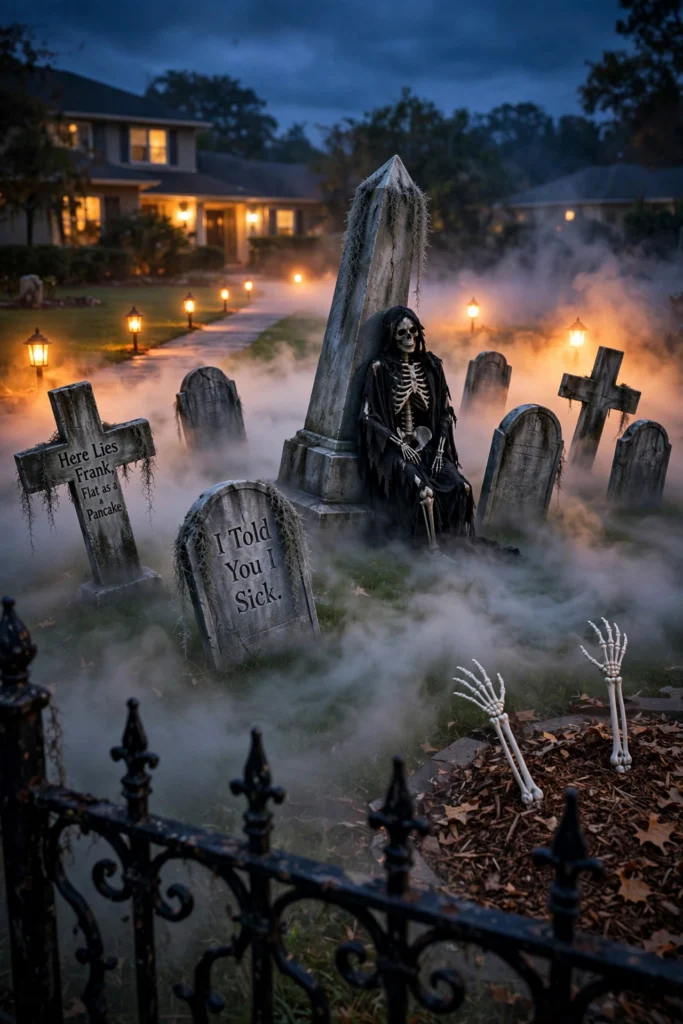
Add skeletal arms reaching up from the ground, a skeleton or two posed against the tombstones, and clumps of Spanish moss draped over everything. The moss is a small addition that adds tremendous age and atmosphere, making new foam look centuries old. A light dusting of gray spray paint on bright white foam tombstones instantly ages them by decades.
A low-lying fog machine is what takes this from decoration to experience. Position it behind the tombstones so fog rolls forward across the lawn, and run it on a timer to conserve fluid. Elevate the fog machine on a small stool behind the tombstones so the fog pours downward and spreads evenly across the lawn. The effect at dusk is unforgettable.
Edge the scene with orange pathway lights or lanterns to guide trick-or-treaters safely. The contrast of the eerie fog with warm guiding lights creates a cinematic look that will have the whole street slowing down to stare. Motion-sensor lights hidden among the tombstones startle trick-or-treaters delightfully as they approach your door.
25. Skeleton Dog Guarding the Porch
A poseable skeleton dog on the porch is equal parts spooky and charming. Position it sitting upright by the front door like a loyal guardian, or lying down with its head on its paws for a touch of humor.
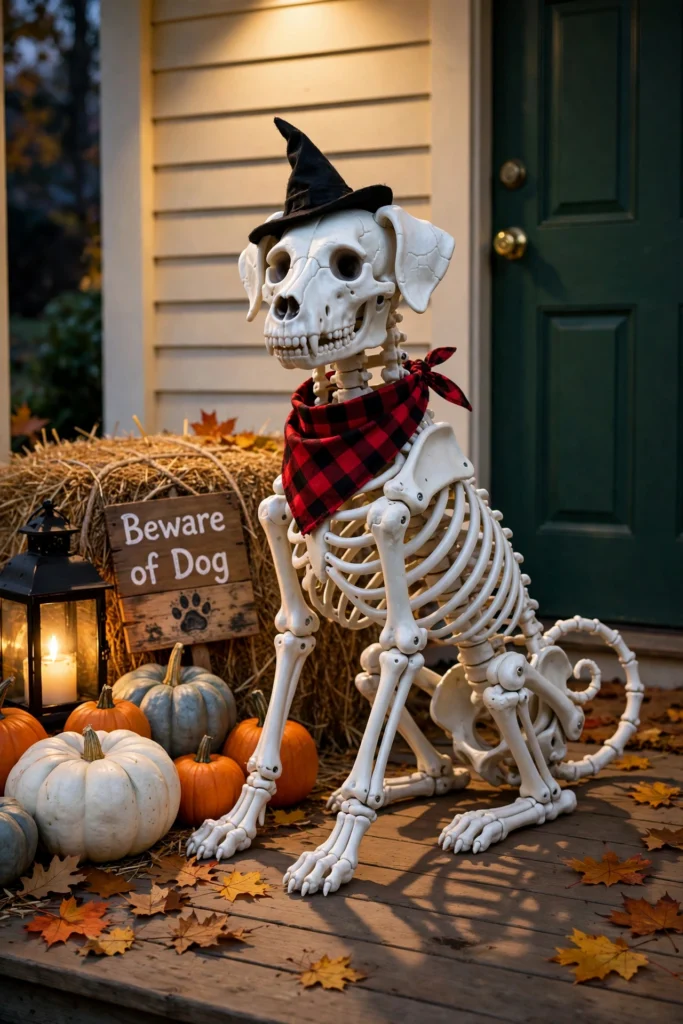
Dress it up with a Halloween bandana, a witch hat, or a collar of faux autumn leaves. These small styling touches give the skeleton personality and show guests that every detail of your decor was considered. A red bandana against white bones is especially striking. Poseable joints mean you can reposition the dog throughout the night, giving repeat visitors a fun surprise.
Surround the dog with pumpkins, lanterns, and a “Beware” sign for a complete porch vignette. The dog becomes the anchor of the scene, the character that ties the other elements together into a story. Hay bales make a perfect rustic base for the vignette.
At night, aim a small spotlight at the skeleton so it casts long shadows across the porch. Kids will be delighted rather than frightened, and adults will appreciate the playful twist on a classic Halloween motif. A waterproof LED collar adds a playful glow and keeps the pup visible to evening foot traffic. It is the kind of detail that makes your home memorable.
26. Bloody Footprint Floor Decals
Bloody footprint decals trailing across your floor create a deliciously creepy narrative. Apply removable vinyl footprints leading from the front door toward the party’s main room, as if something walked in and never left.
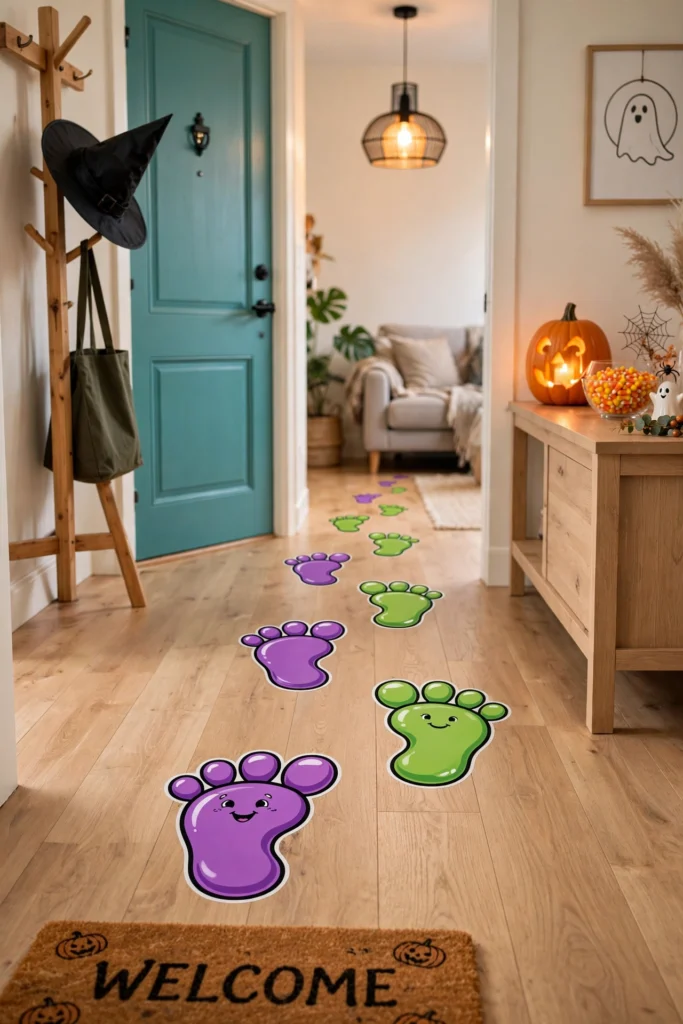
Space the prints naturally, alternating left and right with realistic stride lengths, and let the trail fade as it goes, using fewer prints toward the end. This fading effect suggests the creature is still nearby, which is far spookier than a trail that simply stops. For stairs, place prints on every other step to suggest something bounding upward in a hurry.
Choose decals with a dark, dried-blood tone rather than bright red; they read as more realistic and sophisticated. Because they are removable, they lift off cleanly after the party without damaging hardwood, tile, or laminate. Test one decal on an inconspicuous floor spot first to confirm it removes cleanly from your particular finish.
For maximum effect, keep the entryway lighting dim so guests notice the footprints gradually. The slow discovery, that moment when someone looks down and gasps, is exactly the kind of immersive detail that elevates a party from decorated to unforgettable. Pair the footprints with a few bloody handprints on the front door for a complete crime-scene narrative.
27. Hanging Witch Hats with Twinkle Lights
Suspended witch hats dripping with fairy lights create a magical floating effect. Hang black witch hats from the ceiling at varying heights using clear fishing line, and wrap each hat with a strand of warm white micro lights.
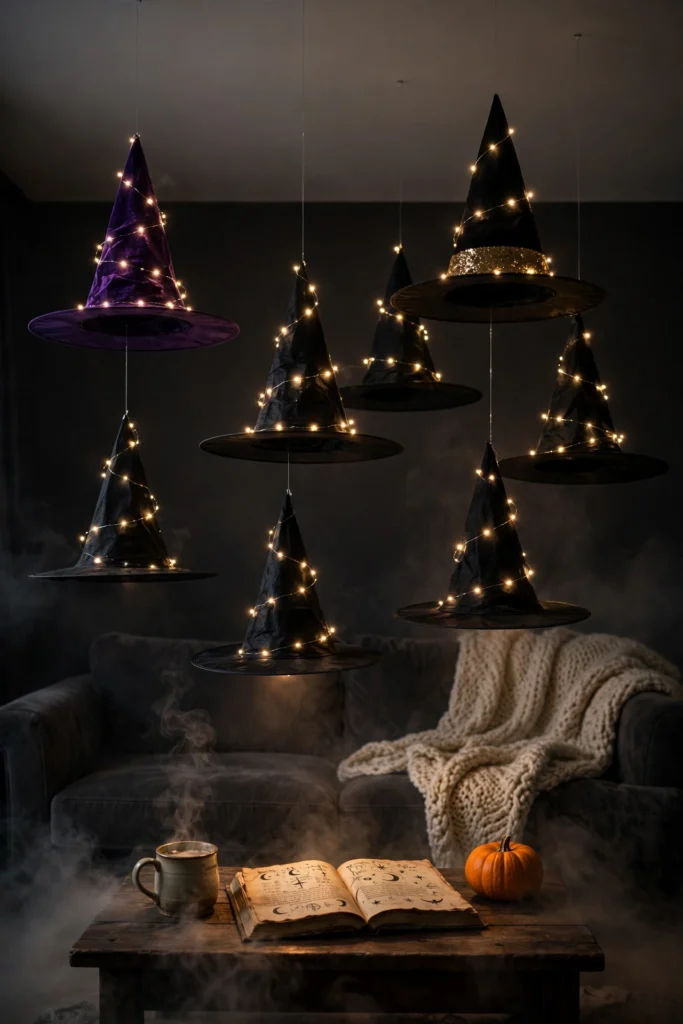
The hats appear to float in midair, and the twinkle lights give them a enchanted glow. This works beautifully over a dining table, in a hallway, or as a canopy above the dance floor. The varying heights create rhythm and movement in the space.
Mix in a few hats in deep purple or with glittery bands for variety, but keep black as the dominant color so the installation reads as cohesive. About seven to nine hats is the sweet spot for most rooms; fewer looks sparse, more can feel cluttered. If your ceiling is very high, use longer fishing line and a telescoping pole to hang each hat precisely.
Add a subtle fog effect beneath the hats if you really want to commit to the magic. The combination of floating hats, twinkling lights, and drifting fog will have your guests feeling like they have stepped into a scene from their favorite fantasy film. Dim the overhead lights fully and let the hats’ glow carry the room for the full enchanted effect.
28. Life-Size Animatronic Reaper Corner
Dedicate a corner to a life-size animatronic reaper for a showstopping scare moment. These figures tower over guests, with glowing eyes, tattered robes, and motion-activated movements that make them lunge or speak when someone approaches. Most models run on batteries or a standard outlet, so placement is flexible.
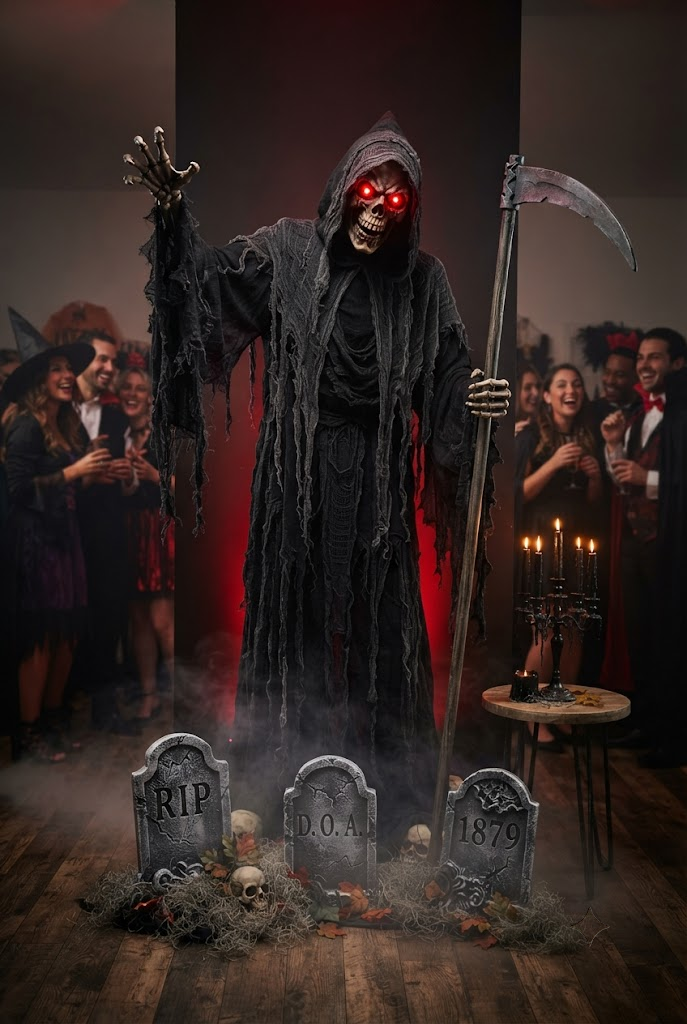
Position the reaper where guests will encounter it naturally but not block traffic, like beside the drinks table or near the hallway to the restroom. The surprise encounter is the whole point, so avoid placing it in plain sight from the entrance. Keep a clear three-foot radius around the figure so startled guests do not knock into furniture or decorations.
Build atmosphere around the figure with dim lighting, a few tombstones, and ground fog. A red or purple uplight behind the reaper creates a menacing silhouette that amplifies the scare factor tenfold. A cheap strobe light set to a slow pulse behind the reaper makes its movements look even more unnatural.
Warn guests with sensitivities or small children in advance, and keep the animatronic’s volume at a reasonable level. Done thoughtfully, the reaper corner becomes the legendary moment of your party, the story guests retell for years. Store the animatronic in its original box with silica packets to protect the electronics from humidity between seasons.
29. Scented Fog Machine Corner
Fog is visual, but scented fog is immersive. Add a Halloween-scented fog fluid, like pumpkin spice, bonfire, or haunted forest, to your fog machine and let fragrance become part of your decor. Scent is powerfully tied to memory, and guests will associate that smell with your party.
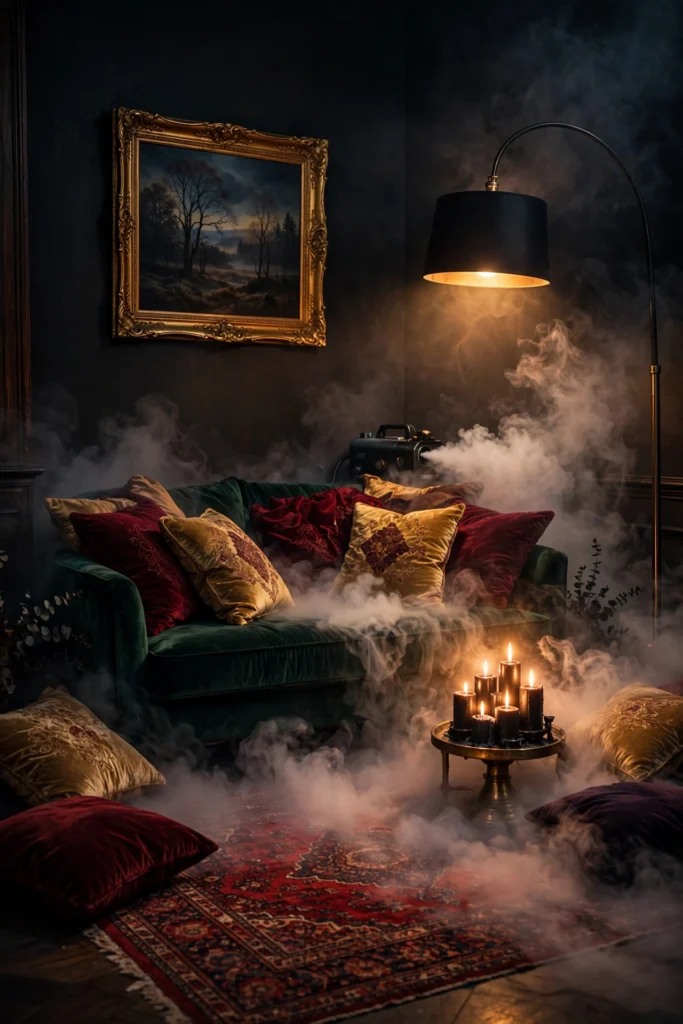
Set up the fog machine in a corner with seating, like a lounge area with dark velvet cushions and candlelight. The fog drifts low across the floor while the scent wraps around guests, creating a multi-sensory experience that feels luxurious and mysterious. Velvet throws and floor cushions in deep jewel tones make the foggy lounge corner irresistibly inviting.
Use the fog sparingly on a timer rather than continuously. Short bursts every few minutes maintain the atmosphere without overwhelming the room or triggering smoke alarms. Always keep the machine away from fabrics and ensure good ventilation. Always use fluid made specifically for your machine’s brand to avoid clogs and keep the warranty intact.
Pair the scented fog with a curated playlist of ambient spooky sounds. When sight, scent, and sound work together, your party transcends decoration and becomes a fully designed environment that guests will never forget. Guests will ask about the scent all night, so keep the bottle handy to share your secret.
30. Take-Home Treat Bag Decor Station
End the night on a high note with a treat bag station that doubles as decor. Set up a table with kraft paper bags, stamps, stickers, ribbons, and markers so guests can decorate their own bags before filling them with candy.
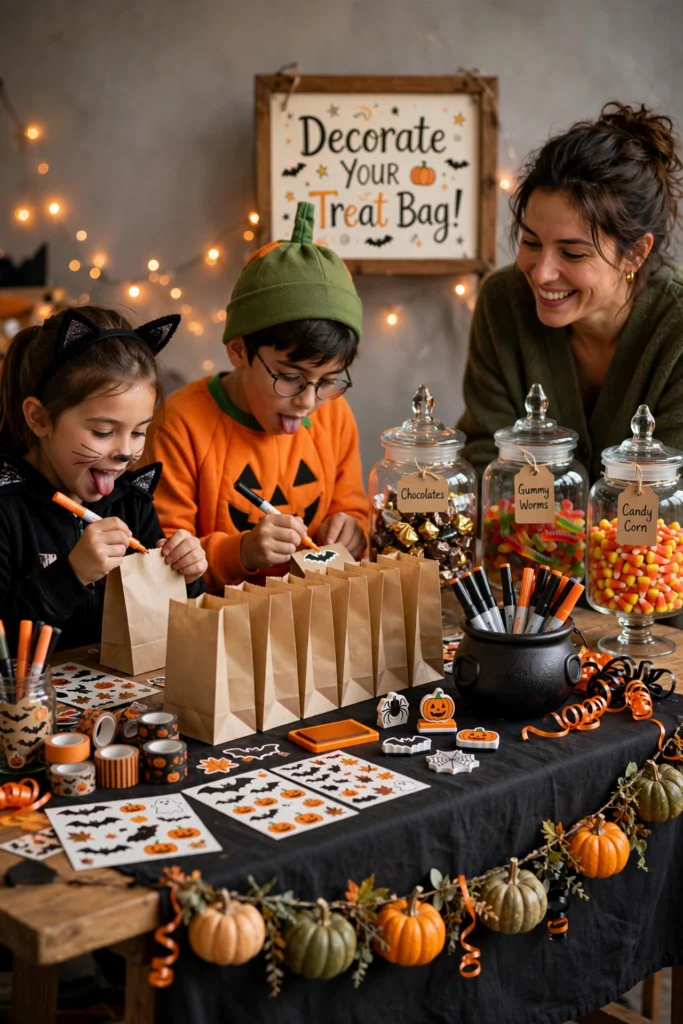
Style the station itself as part of the party: a black tablecloth, a garland of mini pumpkins, and jars of decorating supplies arranged like an art station. It looks inviting from across the room and signals that the fun is not over yet. Washi tape in Halloween patterns is an easy, no-mess decorating supply that even the youngest guests can use confidently.
Stock the candy in apothecary jars or cauldrons around the decorating supplies so the whole table is cohesive. Include a mix of classics and a few upscale treats like artisan chocolates; adults appreciate the upgrade as much as kids love the candy.
This station gives guests a reason to linger as the party winds down and sends them home with a personalized keepsake. It is the perfect final impression, a thoughtful detail that turns a great party into a gracious one. Tuck a handwritten thank-you note into each finished bag for a personal touch that guests will remember.
Key Takeaways
- Start with the entrance: Your door, porch, and entryway set the tone ” invest the most effort where guests form their first impression.
- Layer your lighting: Combine candles, string lights, and spotlights to create depth; dim overheads and let accent lighting carry the mood.
- Stick to a tight color palette: Black, orange, and one metallic (like gold) keeps 30 different ideas feeling cohesive rather than chaotic.
- Mix high and low: Pair a few statement pieces (animatronics, balloon arches) with budget-friendly DIY touches (paper ghosts, decals) for maximum impact.
- Decorate vertically: Don’t forget ceilings, walls, and windows ” overhead installs like floating witch hats fill space that tables can’t.
- Make it interactive: Candy bars, photo booths, and treat-bag stations keep guests mingling and create the moments they’ll photograph and remember.
- Plan with the planner: Use the budget and setup-time table above to shop smart and schedule your decorating day without last-minute stress.